Java for JavaScript Developers: Fundamentals and Spring Boot
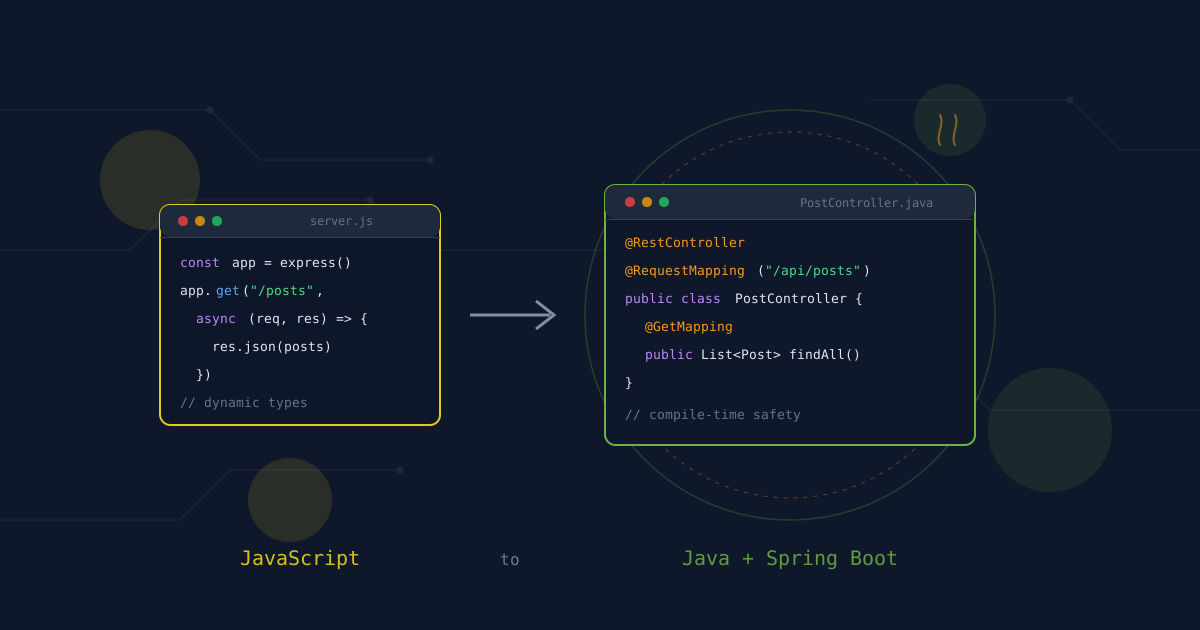
Java and JavaScript share a name, but they were built for different kinds of software. JavaScript started as a way to make web pages interactive and has become a full-stack ecosystem powered by Node.js, browsers, and frontend frameworks. Java was designed from the beginning for large, long-lived, strongly typed systems that run on the Java Virtual Machine.
If you are a JavaScript developer learning Java and Spring Boot, the shift can feel like trading a dynamically typed, event-loop runtime for a compiled, object-oriented platform with strict conventions. The good news is that modern Java has absorbed many functional programming ideas, and Spring Boot removes much of the historical ceremony that once made Java feel heavy.
This is a code-along, not a reference. In Part 1 you will set up Java and learn the language by typing and running every example, with the JavaScript equivalent next to each one so you can compare. In Part 2 you will build and run a real REST API with Spring Boot. By the end you will have two working projects on disk and the mental map to build your own.
Version and scope: the examples use Java 21 LTS and Spring Boot 3.x. Java 21 introduced records as a mainstream tool, pattern matching for switch, and virtual threads; Java 25 is the newest long-term support release, and every example here runs unchanged on it. Spring Boot 3.x builds on Spring Framework 6 and the Jakarta EE namespace, and it supports native image compilation with GraalVM.
Who This Guide Is For
- JavaScript or TypeScript developers who want to learn backend development with Java.
- Frontend engineers moving into full-stack or platform engineering.
- Teams evaluating or adopting Java and Spring Boot.
- Anyone who learns best by comparing a new language to one they already know — and by running code, not just reading it.
How to Use This Guide
Two conventions make the whole article runnable:
- Part 1 (the language) uses a single scratch file called
Playground.java. You will create it during setup. Each section gives you code to paste into it and run withjava Playground.java— most examples include the expected output as a comment so you can check yourself. - Part 2 (Spring Boot) builds one project — a blog API — file by file. Each step ends with a
curlcommand and the response you should see.
Don't copy-paste passively. Type the examples, break them on purpose, and read the compiler errors. Java's error messages are one of its best teachers.
Core Philosophy Differences
The following table highlights the differences you will feel every day.
| Aspect | JavaScript | Java |
|---|---|---|
| Type system | Dynamic (optional TypeScript) | Static and strong |
| Compilation | Interpreted, or JIT (just-in-time) compiled while running | Compiled ahead to JVM bytecode |
| Runtime | Browser, Node.js, Deno, Bun | Java Virtual Machine |
| Concurrency | Event loop, async/await, single-threaded | Threads, virtual threads, thread pools |
| Package manager | npm, yarn, pnpm | Maven, Gradle |
| Module system | ES modules, CommonJS | Java Platform Module System, packages |
| Memory | Garbage collected | Garbage collected, with more tuning options |
JavaScript optimizes for flexibility and fast iteration. Java optimizes for correctness, observability, and maintainability at scale. In Java, many problems that would become runtime errors in JavaScript become compile-time errors, which can feel restrictive until you are working in a large codebase.
Part 1: Learning Java by Running It
Setup: From Zero to Running Code
By the end of this section you will have Java installed, a program running, and a real Maven project on disk — the same kind of project the Spring Boot half of this guide builds on.
Step 1: Install a JDK
Install a Java Development Kit. JDK 21 or JDK 25 — both LTS releases — are safe choices for new Spring Boot work.
If nvm is your whole mental model of a runtime, one clarifying line: Java ships as a kit with two halves — javac, the compiler that turns your .java files into bytecode, and the JVM (Java Virtual Machine), the runtime that executes that bytecode. Node.js is your JVM equivalent; the JDK just also bundles the compiler. You'll hear "Java 21" and "JVM 21" used interchangeably — they mean the same runtime.
On macOS with Homebrew:
brew install --cask temurin@21
On Windows or Linux, download an installer from Adoptium, or use SDKMAN! (sdk install java 21-tem), which is the closest thing Java has to nvm for managing multiple versions.
Verify it worked:
java --version
# openjdk 21.0.x ...
You will also want an IDE. IntelliJ IDEA Community Edition is the standard, though Visual Studio Code with the Extension Pack for Java works well.
Step 2: Run your first Java program — no build tool required
Coming from node app.js, the good news is modern Java can do the same thing. Create a file called Hello.java anywhere:
public class Hello {   // class name must match the file name
  // main is the entry point Java looks for:
  //   public = callable from outside
  //   static = no object needed to call it
  //   void   = returns nothing
  //   String[] args = CLI arguments, like process.argv
  public static void main(String[] args) {
    String name = "world";
    System.out.println("Hello, " + name);
  }
}
Run it directly:
java Hello.java
# Hello, world
No compile step, no project file. Since Java 11, the java launcher compiles and runs single files in one shot — perfect for experimenting. Two rules to know: the class name must match the file name (Hello → Hello.java), and main is the entry point, like the top level of a Node script.
Step 3: Create your Playground
This one file is your companion for all of Part 1. Create Playground.java:
// Imports work differently than in JS: no npm install here.
// Everything below ships with the JDK (the standard library).
// Only java.lang basics like String and System come auto-imported;
// the rest must be imported. The .* form is a wildcard,
// like `import * as` — "everything in this package".

import java.io.IOException;      // thrown by file operations
import java.nio.file.Files;      // file read/write — Node's fs
import java.nio.file.Path;       // an object for a file path
import java.util.*;              // List, Map, Set, Optional...
import java.util.concurrent.*;   // threads, CompletableFuture
import java.util.function.*;     // the types lambdas satisfy
import java.util.stream.*;       // Java's map/filter/reduce

public class Playground {
  // "throws Exception": if anything in main throws a checked
  // exception, just crash — saves try/catch while experimenting
  public static void main(String[] args) throws Exception {
    System.out.println("ready");   // console.log
  }
}
Run it:
java Playground.java
# ready
The imports at the top cover everything Part 1 uses, so you never have to hunt for them. From here on, when a section says "try it," replace the body of main with the example and rerun. When an example defines a new type (a record, class, or interface), add it below the closing brace of the Playground class, in the same file — Java allows multiple classes per file, and single-file launch handles them all.
Step 4: Create a real Maven project
Single files don't scale, so real projects use a build tool — usually Maven or Gradle. The build file lists dependencies and plugins, and the build tool downloads them from Maven Central. This is similar to package.json, except the ecosystem is more conservative and the versions are often pinned by Spring Boot's dependency management.
Unlike npm init, Maven expects a specific directory layout. Create it:
mkdir -p hello-java/src/main/java/com/example
cd hello-java
Create pom.xml in the project root (this is your package.json):
<project xmlns="http://maven.apache.org/POM/4.0.0">
  <modelVersion>4.0.0</modelVersion>    <!-- POM format, always 4.0.0 -->
  <groupId>com.example</groupId>        <!-- like an npm scope -->
  <artifactId>hello-java</artifactId>   <!-- "name" in package.json -->
  <version>1.0.0</version>              <!-- "version" in package.json -->

  <properties>
    <!-- Java version to compile with/for, like tsconfig "target" -->
    <maven.compiler.source>21</maven.compiler.source>
    <maven.compiler.target>21</maven.compiler.target>
    <project.build.sourceEncoding>UTF-8</project.build.sourceEncoding>
  </properties>

  <!-- a <dependencies> block would go here — none needed yet -->
</project>
Create src/main/java/com/example/App.java:
package com.example;   // must mirror the folder path: src/main/java/com/example/

public class App {
  public static void main(String[] args) {
    System.out.println("Hello from Maven");
  }
}
Note the package com.example; line — it must match the folder path under src/main/java. This is a hard rule in Java, not a convention.
Install Maven if you don't have it (brew install maven, or see maven.apache.org), then build and run:
mvn clean compile
java -cp target/classes com.example.App
# Hello from Maven
mvn clean compile compiles everything under src/main/java into target/classes, and java -cp runs a class from that output — -cp sets the classpath, roughly Java's module resolution path.
The Gradle equivalent
If you prefer Gradle, build.gradle replaces pom.xml with the same directory layout:
plugins {
  id 'java'
}

group = 'com.example'
version = '1.0.0'

java {
  sourceCompatibility = JavaVersion.VERSION_21
}

repositories {
  mavenCentral()
}
Then run gradle build. Gradle can also scaffold all of this for you with gradle init.
One reassurance before moving on: when we get to Spring Boot, you will not hand-build any of this. The Spring Initializr generates the whole project — layout, build file, and a wrapper script (./mvnw) so you don't even need Maven installed globally. The point of this section is that when you open that generated project, nothing in it looks mysterious. From here the article uses Maven; Gradle is the equivalent tool and everything we do maps 1:1 onto ./gradlew build / ./gradlew bootRun.
For the rest of Part 1, stay in Playground.java.
Types and Variables
Dynamic vs static typing
In JavaScript, a variable can hold any value and change its type at runtime:
let value = "hello";
value = 42;
value = { name: "Alice" };
In Java, every variable has a type that is checked at compile time. Try it — paste this into main and run:
String value = "hello";
System.out.println(value);
// value = 42; // uncomment this line and rerun
With the line uncommented, the program doesn't even start:
Playground.java:13: error: incompatible types: int cannot be converted to String
That error at compile time is the core trade. In JavaScript this bug would ship and surface later as value.toUpperCase is not a function in production.
Java has primitive types for numbers and booleans, and reference types for everything else:
int count = 42;
double price = 19.99;
boolean active = true;
char grade = 'A';
String name = "Alice";
System.out.println(name + " scored " + grade + " with " + count + " points");
// Alice scored A with 42 points
Strings and text blocks
Java strings are immutable like in JavaScript. Text blocks, introduced in Java 15, are Java's template-literal-style multiline strings:
// JavaScript
const json = `{
  "name": "Alice",
  "active": true
}`;
String json = """
  {
    "name": "Alice",
    "active": true
  }
  """;
System.out.println(json);
One thing text blocks do not do is interpolation — there is no ${}. Instead, Java uses format specifiers: %s and %d are placeholders in the string, filled in order by the arguments you pass to .formatted(...):
String name = "Alice";

// %s = "string goes here", %d = "whole number goes here"
// .formatted(...) fills them in order: %s ← name, %d ← 3
String greeting = "Hello, %s! You have %d messages.".formatted(name, 3);
System.out.println(greeting);
// Hello, Alice! You have 3 messages.
The letters matter — they're type-checked, and passing a non-number to %d is an error. The ones you'll meet constantly:
| Specifier | Data Type | Example Input | Formatted Output |
|---|---|---|---|
%s |
String / any Object | "Alice" |
Alice |
%d |
Integer (int, long, byte, short) |
42 |
42 |
%f |
Floating-point (double, float) |
19.99 |
19.990000 |
%.2f |
Floating-point, rounded to 2 decimals | 19.991 |
19.99 |
%b |
Boolean | true |
true |
%n |
Platform-independent newline | (no argument needed) | (line break) |
Watch that %f row: with no precision given, Java pads to six decimal places — almost never what you want for display, which is why %.2f shows up everywhere money does.
Try it: print "Total: $%.2f%n".formatted(19.999) and check the rounding. Then swap the arguments to .formatted(3, name) and read the runtime error — order matters, and this is exactly the kind of mistake ${name} never let you make. (If you're thinking "that's a downside" — pre-2015 JavaScript's "Hello, " + name had the same problem, and C-style format strings predate both. Every language pays for string building somewhere.)
Comparing values: == is not what you think
This is the most common Java beginner trap, so let's hit it early. In JavaScript, === on two strings compares their contents. In Java, == on objects compares references — "are these the exact same object in memory?" Run this:
String a = "hello";
String b = new String("hello");   // force a second, separate object

System.out.println(a == b);        // false — different objects!
System.out.println(a.equals(b));   // true  — same contents
The rule: == for primitives (int, double, boolean, char), .equals() for objects — which means always .equals() for strings. The cruel part is that == on strings sometimes appears to work (Java reuses identical string literals), so the bug hides until it doesn't.
This is also why it matters that records (two sections down) generate equals for you: two records with the same field values are .equals(), the way you'd hope. Hand-written classes don't get that for free.
Type inference with var
Java 10 added var for local variables. It looks like JavaScript's let, but the type is still static — it is just inferred by the compiler:
var name = "Alice"; // String, forever
var count = 42;     // int, forever
// name = 10;       // still a compile error — try it
System.out.println(name + " / " + count);
You can use var for local variables, but not for fields or method parameters.
Records
In JavaScript you'd reach for an object literal; in TypeScript, an interface:
interface User { name: string; email: string; }
const user = { name: "Alice", email: "alice@example.com" };
Java's equivalent for immutable data is a record — a real class with a generated constructor, accessors, equals, hashCode, and toString. Add this line below the Playground class (same file, after its closing brace):
record User(String name, String email) {}
One rule about where it lives: only one class per file can be public, and it must match the filename — so the extra records and classes you add to Playground.java are intentionally not public (package-private). If you copy the public class habit from Hello.java down here, you'll get a "class is public, should be declared in a file named User.java" error. Package-private is fine within a single file.
Then in main:
User user = new User("Alice", "alice@example.com");
System.out.println(user.name());
// Alice
System.out.println(user);
// User[name=Alice, email=alice@example.com]
Notice you got a readable toString for free — plain Java classes print as Playground$User@1b6d3586-style garbage until you write one. Use records for DTOs and value objects. (DTO = data transfer object: a class whose only job is carrying data between layers or across the wire — the shape of a JSON request or response, basically. A value object is similar but internal: a Point, a Money, a DateRange. Neither has behavior; both are just typed data — which is exactly what records are for.)
Pattern matching for switch
Java 21's pattern matching for switch is similar to TypeScript discriminated unions with exhaustiveness checking. Add this method inside the Playground class, next to main. Note the static keyword — main is static, and a static method can only call other static methods directly (a non-static method belongs to an instance of the class, and there is no instance of Playground). That's why every helper you add in this file is static. If you drop it, the compiler refuses:
static String describe(Object value) {
  return switch (value) {
    case Integer i -> "integer: " + i;
    case String s -> "string: " + s;
    case null -> "null";
    default -> "unknown";
  };
}
And in main:
System.out.println(describe(42));      // integer: 42
System.out.println(describe("hi"));    // string: hi
System.out.println(describe(null));    // null
System.out.println(describe(3.14));   // unknown
Try it: add a case Double d -> branch and rerun. Then remove the default branch and read the compiler error — the compiler tracks whether your switch covers every case.
Collections and Generics
In JavaScript, arrays and objects do everything. Java splits the job across List (array), Map (object/Map), and Set, and every collection declares what it holds.
Generics: the angle brackets
List<String> reads as "a List of Strings" — the <String> is a generic type parameter, exactly like TypeScript's Array<string>. The compiler enforces it: you can't put a number in a List<String>, and everything you take out is already a String, no casting.
List<String> fruits = new ArrayList<>();   // mutable, like []
fruits.add("apple");                       // push
fruits.add("banana");
// fruits.add(42);                         // compile error — try it

System.out.println(fruits.get(0));         // fruits[0] → apple
System.out.println(fruits.size());         // .length  → 2

Map<String, Integer> ages = new HashMap<>();      // {} / new Map()
ages.put("Alice", 30);                            // ages["Alice"] = 30
System.out.println(ages.get("Alice"));            // 30
System.out.println(ages.getOrDefault("Bob", 0));  // no undefined —
                                                  // you pick the fallback
One wrinkle: generics only work with object types, so it's List<Integer>, never List<int>. Integer is the object wrapper around the primitive int, and Java converts between them automatically ("autoboxing") — you'll mostly not notice, but it explains some type names you're about to see in the streams section.
The immutability catch
List.of(...), which the examples use constantly, creates an immutable list — think Object.freeze. This compiles fine and explodes at runtime:
List<String> frozen = List.of("a", "b");
frozen.add("c");   // UnsupportedOperationException — run it and see
Need a mutable copy? Wrap it:
List<String> thawed = new ArrayList<>(List.of("a", "b"));
thawed.add("c");   // fine
System.out.println(thawed);   // [a, b, c]
Rule of thumb: List.of for fixed data, new ArrayList<>() when you'll add and remove.
Looping
Java's for-each is JavaScript's for...of:
List<String> fruits = List.of("apple", "banana", "cherry");

for (String fruit : fruits) {   // for (const fruit of fruits)
  System.out.println(fruit);
}

fruits.forEach(f -> System.out.println(f));   // .forEach works too
The C-style for (int i = 0; i < 10; i++) also exists and looks exactly like its JS twin.
Object-Oriented Java
Java is class-based and object-oriented. Every piece of code lives inside a class. In JavaScript, classes are one option among many; in Java, they are the unit of everything.
Classes and fields
Here is the classic shape of a Java class. Add it below Playground (you can delete the User record first, or keep both):
class Person {
  private String name;
  private String email;

  Person(String name, String email) {
    this.name = name;
    this.email = email;
  }

  String getName() {
    return name;
  }

  void setName(String name) {
    this.name = name;
  }

  String getEmail() {
    return email;
  }
}
In main:
Person p = new Person("Alice", "alice@example.com");
p.setName("Alicia");
System.out.println(p.getName() + " <" + p.getEmail() + ">");
// Alicia <alice@example.com>
Fields are usually private and accessed through getters and setters. Coming from JavaScript this feels like ceremony — and it is; that's why records exist for pure data. Use classes when there's mutable state or behavior, records when it's just data. The getter/setter convention (JavaBeans) matters in Spring, where frameworks discover properties through it.
Inheritance and overriding
class Animal {
  private String name;

  Animal(String name) {
    this.name = name;
  }

  String getName() {
    return name;
  }

  String speak() {
    return getName() + " makes a sound";
  }
}

class Dog extends Animal {
  Dog(String name) {
    super(name);
  }

  @Override
  String speak() {
    return getName() + " barks";
  }
}
In main:
Animal generic = new Animal("Rex");
Animal dog = new Dog("Fido");
System.out.println(generic.speak()); // Rex makes a sound
System.out.println(dog.speak());     // Fido barks
The second line is polymorphism: the variable's type is Animal, but the object's type decides which speak runs — same as JavaScript prototypes, but checked at compile time. The @Override annotation is not required, but it catches mistakes: try it — rename speak to speka in Dog and watch the compiler refuse.
Interfaces
Java interfaces are contracts. Unlike JavaScript's duck typing ("if it has a .process method, call it"), Java requires an explicit implements declaration:
interface Greeter {
  String greet(String name);
}

class FriendlyGreeter implements Greeter {
  public String greet(String name) {
    return "Hey there, " + name + "!";
  }
}

class FormalGreeter implements Greeter {
  public String greet(String name) {
    return "Good day, " + name + ".";
  }
}
In main:
List<Greeter> greeters = List.of(new FriendlyGreeter(), new FormalGreeter());
for (Greeter g : greeters) {
  System.out.println(g.greet("Alice"));
}
// Hey there, Alice!
// Good day, Alice.
This pattern — code against the interface, swap the implementation — is the heart of how Spring works, so it's worth letting it sink in here.
Abstract classes
An abstract class can declare methods without implementations. It sits between a concrete class and an interface:
abstract class Shape {
  abstract double area();

  void printArea() {
    System.out.println("Area: " + area());
  }
}

class Circle extends Shape {
  private final double radius;

  Circle(double radius) {
    this.radius = radius;
  }

  double area() {
    return Math.PI * radius * radius;
  }
}
In main:
new Circle(2).printArea();
// Area: 12.566370614359172
Access modifiers
| Modifier | Same class | Same package | Subclass | Anywhere |
|---|---|---|---|---|
| public | yes | yes | yes | yes |
| protected | yes | yes | yes | no |
| package-private | yes | yes | no | no |
| private | yes | no | no | no |
If you omit a modifier, the member is package-private — visible to its neighbors, hidden from everyone else. The playground classes above use it because they all share a file; in a real project you'll write public on most things by intent, not by default. This table is a common source of confusion for JavaScript developers, where everything is public unless you use #private fields.
Functional Java: Lambdas and Streams
Java 8 added lambdas and the Stream API. If you are used to map, filter, and reduce in JavaScript, this section will feel like home with extra steps.
Lambdas
Side by side:
// JavaScript
const upper = names.map(n => n.toUpperCase());
List<String> names = List.of("Alice", "Bob", "Charlie");

List<String> upper = names.stream()
  .map(String::toUpperCase)
  .toList();

System.out.println(upper);
// [ALICE, BOB, CHARLIE]
Two differences: Java collections don't have map directly — you enter the stream world with .stream() and leave it with .toList() — and String::toUpperCase is a method reference, shorthand for the lambda s -> s.toUpperCase().
Common stream operations
List<Integer> numbers = List.of(1, 2, 3, 4, 5, 6);

List<Integer> evens = numbers.stream()
  .filter(n -> n % 2 == 0)
  .toList();
System.out.println(evens);
// [2, 4, 6]

int sum = numbers.stream()
  .reduce(0, Integer::sum);
System.out.println(sum);
// 21

double average = numbers.stream()
  .mapToInt(Integer::intValue)   // unbox Integer objects → raw ints,
  .average()                     // unlocking math ops like average()
  .orElse(0.0);
System.out.println(average);
// 3.5
Collecting
List<String> names = List.of("Alice", "Bob", "Charlie");

Set<String> unique = names.stream().collect(Collectors.toSet());

Map<String, Integer> nameLengths = names.stream()
  .collect(Collectors.toMap(Function.identity(), String::length));

System.out.println(nameLengths);
// {Bob=3, Alice=5, Charlie=7}
Try it: take List.of("apple", "banana", "cherry", "avocado") and produce a Map<Character, List<String>> grouping words by first letter. (Hint: Collectors.groupingBy(w -> w.charAt(0)).)
Optional
Optional is Java's answer to undefined-checking. It is a container that may or may not hold a value, and it forces you to acknowledge the empty case. Add this method to Playground:
static Optional<String> findUser(long id) {
  return id == 1 ? Optional.of("Alice") : Optional.empty();
}
In main:
String found = findUser(1).map(String::toUpperCase).orElse("UNKNOWN");
String missing = findUser(99).map(String::toUpperCase).orElse("UNKNOWN");
System.out.println(found);   // ALICE
System.out.println(missing); // UNKNOWN
Where JavaScript writes user?.toUpperCase() ?? "UNKNOWN", Java chains through the Optional. You will see this shape constantly in Spring Data repositories.
Handling Nulls and Exceptions
Null in Java
Java does not have a ?. optional chaining operator. Calling a method on null throws a NullPointerException — Java's cannot read properties of undefined. Try it and watch it explode:
String s = null;
System.out.println(s.length()); // NullPointerException at runtime
The modern medicine is Optional.ofNullable for values that might be absent:
String maybeNull = Math.random() > 0.5 ? "hello" : null;

String result = Optional.ofNullable(maybeNull)
  .map(String::toUpperCase)
  .orElse("nothing there");

System.out.println(result);
// HELLO (or: nothing there)
Exception handling
Java has two families of exceptions: checked and unchecked. Checked exceptions are declared in method signatures and must be caught or propagated — the compiler enforces it. Unchecked exceptions extend RuntimeException and behave like JavaScript's throw-anything model.
You can feel the difference by reading a file that doesn't exist. Run this:
try {
  String content = Files.readString(Path.of("data.json"));
  System.out.println(content);
} catch (IOException e) {
  System.out.println("Could not read file: " + e.getMessage());
}
// Could not read file: data.json
Now create the file and rerun:
echo '{"ok": true}' > data.json
java Playground.java
# {"ok": true}
Try it: delete the try/catch and call Files.readString bare. The program won't compile — IOException is checked, and the compiler demands you either catch it or add throws IOException to the method. This is the compiler forcing the error-handling conversation that JavaScript lets you skip.
The try-with-resources statement automatically closes resources — no finally cleanup dance:
try (var reader = Files.newBufferedReader(Path.of("data.json"))) {
  System.out.println(reader.readLine());
} catch (IOException e) {
  throw new RuntimeException(e);
}
Custom exceptions
class UserNotFoundException extends RuntimeException {
  UserNotFoundException(long id) {
    super("User not found: " + id);
  }
}
In main:
try {
  throw new UserNotFoundException(42);
} catch (UserNotFoundException e) {
  System.out.println(e.getMessage());
}
// User not found: 42
We will put this exact pattern to work in Part 2, where a global handler turns custom exceptions into proper HTTP error responses.
Concurrency: From Promises to Threads and Virtual Threads
JavaScript concurrency is single-threaded with an event loop: nothing runs in parallel in your code, so count++ can never race. Java concurrency is multi-threaded: things genuinely run at the same time. This buys real parallelism and costs you new failure modes — Part 2's capstone hits one deliberately.
Classic threads
var thread = new Thread(() -> {
  System.out.println("Running in: " + Thread.currentThread());
});
thread.start();
System.out.println("Main keeps going in: " + Thread.currentThread());
thread.join(); // wait for it, like await
Run it a few times — the two lines can print in either order. That's parallelism.
Virtual threads
Java 21 introduced virtual threads: lightweight threads managed by the JVM, similar to goroutines. They make plain blocking code scale like async code — no async/await coloring, no callback chains:
try (var executor = Executors.newVirtualThreadPerTaskExecutor()) {
  for (int i = 1; i <= 5; i++) {
    int id = i;   // lambdas capture effectively-final locals; `i` changes
                  // every pass, so copy it to a stable local the lambda sees
    executor.submit(() -> {
      Thread.sleep(1000); // pretend this is a database call
      System.out.println("fetched user " + id);
      return id;
    });
  }
} // the try block waits for all tasks
System.out.println("all done");
Run it: all five "fetched user" lines appear after roughly one second, not five — the sleeps overlapped. Each task blocks, but blocking a virtual thread is nearly free. This is why you can write straightforward sequential code in Spring Boot and still handle heavy traffic.
CompletableFuture
For promise-style composition, CompletableFuture is the closest Java equivalent:
// JavaScript
fetchUser(1).then(u => u.name).then(console.log);
CompletableFuture.supplyAsync(() -> "Alice")   // pretend this fetches
  .thenApply(String::toUpperCase)              // .then(...)
  .thenAccept(System.out::println)             // .then(...)
  .join();                            // block until done, or main exits
// ALICE
With virtual threads available, much new Java code skips CompletableFuture chains and just writes blocking code — but you will see this API everywhere in existing codebases.
Part 2: Build a Blog API with Spring Boot
Playground closed — now we build something real: a REST API for blog posts with a database, validation, error handling, and tests. Every step ends with something you can run.
Spring Boot at a Glance
Spring Boot is an opinionated layer on top of the Spring Framework. It provides auto-configuration, embedded servers, and starter dependencies that group common libraries together. Where an Express app is you assembling middleware, a Spring Boot app is you filling in blanks in a machine that already knows how to be a web server.
Step 1: Generate the project
Use the Spring Initializr — either the website at start.spring.io (select Maven, Java 21, Spring Boot 3.x, and the dependencies below), or straight from the terminal:
curl https://start.spring.io/starter.zip \
  -d type=maven-project \
  -d javaVersion=21 \
  -d groupId=com.example -d artifactId=blog -d name=blog \
  -d dependencies=web,data-jpa,h2,validation,devtools \
  -o blog.zip
unzip blog.zip -d blog && cd blog
The dependencies:
- Spring Web — REST controllers and the embedded Tomcat server
- Spring Data JPA — database access (JPA = Jakarta Persistence API, the standard for mapping Java objects to database tables; think of it as Java's built-in answer to an ORM like Prisma)
- H2 Database — an in-memory database for development, zero setup
- Validation — request validation annotations
- Spring Boot DevTools — auto-restart on change, like nodemon
Look at what was generated:
blog/
  mvnw                  ← Maven wrapper: ./mvnw runs Maven without installing it
  pom.xml               ← dependencies, like package.json
  src/
    main/
      java/com/example/blog/
        BlogApplication.java
      resources/
        application.properties
    test/
      java/com/example/blog/
You recognize all of this from Part 1's setup — Initializr just typed it for you. The package structure matters: Spring scans for components from BlogApplication's package downward, so everything we create goes under com.example.blog.
BlogApplication.java is the whole entry point:
// one annotation = auto-configuration + scan this package for components
@SpringBootApplication
public class BlogApplication {
  public static void main(String[] args) {
    // boots the server — app.listen(), roughly
    SpringApplication.run(BlogApplication.class, args);
  }
}
Run it:
./mvnw spring-boot:run
Watch the log: an embedded Tomcat starts on port 8080. In a second terminal:
curl http://localhost:8080/anything
# {"timestamp":"...","status":404,"error":"Not Found","path":"/anything"}
A 404 with a JSON body — the server is alive; it just has no routes yet. Leave it running: DevTools restarts it automatically as you add files.
Step 2: Your first endpoint
Create src/main/java/com/example/blog/controller/HelloController.java:
package com.example.blog.controller;

import java.util.Map;   // standard library, like in Part 1

// org.springframework imports come from the dependencies in pom.xml —
// this is the equivalent of importing from "express" in node_modules
import org.springframework.web.bind.annotation.GetMapping;
import org.springframework.web.bind.annotation.RestController;

// @RestController: "this class handles HTTP and returns JSON" —
// Spring finds it automatically by scanning the package
@RestController
public class HelloController {

  @GetMapping("/hello")   // app.get("/hello", ...)
  public Map<String, String> hello() {
    return Map.of("message", "Hello from Spring Boot");
    // returned objects auto-serialize to JSON
  }
}
(Your IDE will offer to add imports automatically as you type — they're written out here so nothing blocks you.)
curl http://localhost:8080/hello
# {"message":"Hello from Spring Boot"}
Compare with Express: app.get("/hello", (req, res) => res.json({ message: "..." })). Same idea — the route is an annotation, the handler is a method, and returning an object serializes it to JSON automatically.
Step 3: The Post entity
Now the real model. Create src/main/java/com/example/blog/model/Post.java:
package com.example.blog.model;

import jakarta.persistence.*;      // JPA: maps classes to tables
import jakarta.validation.constraints.NotBlank;   // validation rules
import java.time.LocalDateTime;    // built-in date-time, no Moment.js
// Hibernate is the library that implements JPA under the hood
import org.hibernate.annotations.CreationTimestamp;

@Entity                    // "this class is a database table"
@Table(name = "posts")     // ...named "posts" (defaults to the class name otherwise)
public class Post {

  @Id                      // primary key...
  @GeneratedValue(strategy = GenerationType.IDENTITY)   // ...auto-increment
  private Long id;         // Long (object), not long (primitive):
                           // it must be null before the DB assigns one

  @NotBlank                    // validation: reject blank (via @Valid later)
  @Column(nullable = false)    // schema constraint: NOT NULL in the database
  private String title;

  private String content;      // no annotations = plain nullable column

  @NotBlank
  @Column(nullable = false)
  private String author;

  @CreationTimestamp              // Hibernate fills this with "now" on INSERT
  private LocalDateTime createdAt;

  public Long getId() { return id; }
  public String getTitle() { return title; }
  public void setTitle(String title) { this.title = title; }
  public String getContent() { return content; }
  public void setContent(String content) { this.content = content; }
  public String getAuthor() { return author; }
  public void setAuthor(String author) { this.author = author; }
  public LocalDateTime getCreatedAt() { return createdAt; }
}
@Entity maps the class to a database table; each field becomes a column. @GeneratedValue is auto-increment, @CreationTimestamp fills the date on insert, and @NotBlank is validation we'll trigger in Step 6. The getters and setters are the JavaBeans ceremony from Part 1 — this is where it earns its keep, because JPA and Jackson (the JSON serializer) discover properties through it. (Records cannot be JPA entities in the current specification, so entities stay classes.)
Step 4: Repository and seed data
Create src/main/java/com/example/blog/repository/PostRepository.java:
package com.example.blog.repository;

import com.example.blog.model.Post;   // our own class, by package
import java.util.List;
import org.springframework.data.jpa.repository.JpaRepository;

// JpaRepository<Post, Long> = "a repository of Posts, id type Long".
// Extending it inherits save(), findById(), findAll(), deleteById(),
// count()... all for free.
public interface PostRepository extends JpaRepository<Post, Long> {
  List<Post> findAllByOrderByCreatedAtDesc();   // ORDER BY created_at DESC
  List<Post> findByAuthorIgnoreCase(String a);  // WHERE LOWER(author) = ?
}
That's the entire data layer. No implementation — Spring Data JPA reads the method names, derives the SQL, and generates the class at startup. findByAuthorIgnoreCase becomes WHERE LOWER(author) = LOWER(?). It feels like magic the first time; it's really a naming DSL — and it scales to everything you'd write in SQL: deleteByAuthor(name), countByTitle(...), findFirst5ByOrderByIdDesc(), you name it. If a method name in the DSL isn't supported you'll get a runtime error at startup, not a silent wrong query.
So we have something to look at, seed two posts. Create src/main/java/com/example/blog/config/DataSeeder.java:
package com.example.blog.config;

import com.example.blog.model.Post;
import com.example.blog.repository.PostRepository;
import org.springframework.boot.CommandLineRunner;
import org.springframework.context.annotation.Bean;
import org.springframework.context.annotation.Configuration;

@Configuration   // "this class defines beans" — objects Spring manages
public class DataSeeder {

  // @Bean: the return value becomes a managed object. Spring runs
  // every CommandLineRunner it finds once, at startup. Asking for
  // PostRepository as a parameter makes Spring inject it. And since
  // CommandLineRunner is a one-method interface, a lambda satisfies
  // it — Part 1's interfaces + lambdas working together.
  @Bean
  CommandLineRunner seed(PostRepository posts) {
    return args -> {
      if (posts.count() == 0) {
        Post first = new Post();
        first.setTitle("Hello Java");
        first.setContent("First post, seeded at startup");
        first.setAuthor("BJ");
        posts.save(first);

        Post second = new Post();
        second.setTitle("Hello Spring Boot");
        second.setContent("Second post, seeded at startup");
        second.setAuthor("BJ");
        posts.save(second);
      }
    };
  }
}
A CommandLineRunner runs once at startup — and notice it's just a lambda, straight from Part 1. Notice also what we didn't do: connect to a database. H2 is on the classpath, so Spring Boot auto-configured an in-memory database and pointed JPA at it. That's auto-configuration in one sentence.
Step 5: Service and controller
The service layer holds business logic between the controller and the repository. Create src/main/java/com/example/blog/service/PostService.java:
package com.example.blog.service;

import com.example.blog.model.Post;
import com.example.blog.repository.PostRepository;
import java.util.List;
import java.util.Optional;
import org.springframework.stereotype.Service;

@Service   // a business-logic component — Spring creates and manages it
public class PostService {

  // final = set once in the constructor, never reassigned
  private final PostRepository postRepository;

  // Constructor injection: you never call `new PostService(...)`.
  // Spring sees the constructor needs a PostRepository → passes one in.
  public PostService(PostRepository postRepository) {
    this.postRepository = postRepository;
  }

  public List<Post> findAll() {
    return postRepository.findAllByOrderByCreatedAtDesc();
  }

  public Optional<Post> findById(Long id) {
    return postRepository.findById(id);
  }

  public Post save(Post post) {
    return postRepository.save(post);
  }

  // load the existing post, update its fields, save the same row back.
  // Optional chain: present → a Post, empty → null for the caller to 404.
  public Optional<Post> update(Long id, Post updates) {
    return postRepository.findById(id)
      .map(existing -> {
        existing.setTitle(updates.getTitle());
        existing.setContent(updates.getContent());
        existing.setAuthor(updates.getAuthor());
        return postRepository.save(existing);   // same id, mutated fields
      });
  }

  public void deleteById(Long id) {
    postRepository.deleteById(id);
  }
}
Nobody ever calls new PostService(...). Spring sees the @Service annotation, constructs it, and hands it the repository through the constructor — dependency injection, the interface-driven pattern from Part 1 running the show.
Now the real controller. Create src/main/java/com/example/blog/controller/PostController.java (and feel free to delete HelloController):
package com.example.blog.controller;

import com.example.blog.model.Post;
import com.example.blog.service.PostService;
import jakarta.validation.Valid;
import java.util.List;
import org.springframework.http.HttpStatus;
import org.springframework.http.ResponseEntity;
import org.springframework.web.bind.annotation.*;   // all web annotations

@RestController
@RequestMapping("/api/posts")   // base path for every route below
public class PostController {

  private final PostService postService;

  public PostController(PostService postService) {   // injection again
    this.postService = postService;
  }

  @GetMapping   // no path = the base path itself: GET /api/posts
  public List<Post> getAllPosts() {
    return postService.findAll();   // serializes to a JSON array
  }

  // {id} is a route param, like Express /:id
  // @PathVariable = req.params.id, already parsed into a Long
  @GetMapping("/{id}")
  public ResponseEntity<Post> getPostById(@PathVariable Long id) {
    return postService.findById(id)
      .map(ResponseEntity::ok)                      // has value → 200
      .orElse(ResponseEntity.notFound().build());   // empty → 404
  }

  // @RequestBody = req.body parsed from JSON into a Post
  // @Valid = run the @NotBlank rules; failures → 400 automatically
  @PostMapping
  public ResponseEntity<Post> createPost(@RequestBody @Valid Post post) {
    Post saved = postService.save(post);
    return ResponseEntity.status(HttpStatus.CREATED).body(saved);
    // ↑ res.status(201).json(saved)
  }

  // PUT replaces the resource at this id: @PathVariable grabs the id,
  // @RequestBody the new values. Both optional chains map to HTTP —
  // present → 200 with the updated post, empty → 404.
  @PutMapping("/{id}")
  public ResponseEntity<Post> updatePost(
    @PathVariable Long id, @RequestBody @Valid Post post
  ) {
    return postService.update(id, post)
      .map(ResponseEntity::ok)
      .orElse(ResponseEntity.notFound().build());
  }

  @DeleteMapping("/{id}")
  public ResponseEntity<Void> deletePost(@PathVariable Long id) {
    postService.deleteById(id);           // Void = no response body
    return ResponseEntity.noContent().build();   // 204
  }
}
Key annotations: @RestController marks a web controller; @RequestMapping sets the base path; @GetMapping/@PostMapping/@PutMapping/@DeleteMapping map HTTP methods; @PathVariable binds URL segments; @RequestBody deserializes JSON into a Post; @Valid triggers the @NotBlank rules from the entity. ResponseEntity controls status and headers explicitly. And look at getPostById and updatePost — that's the Optional chain from Part 1, mapped straight onto HTTP: present → 200, empty → 404. (GET uses the one-liner, POST/PUT read the body; every method returns ResponseEntity<WhatItReturns> — the generic wraps the body type, and Void on delete is Spring's way of saying "no body.")
Now exercise all of it — the same CRUD you'd write in Express, in four files:
curl http://localhost:8080/api/posts
# [{"id":2,"title":"Hello Spring Boot",...},{"id":1,"title":"Hello Java",...}]

curl -X POST http://localhost:8080/api/posts \
  -H "Content-Type: application/json" \
  -d '{"title":"Written from curl","content":"It lives","author":"BJ"}'
# {"id":3,"title":"Written from curl",...}   ← note the 201 and generated id

curl http://localhost:8080/api/posts/3
# {"id":3,"title":"Written from curl",...}

curl -X PUT http://localhost:8080/api/posts/3 \
  -H "Content-Type: application/json" \
  -d '{"title":"Edited","content":"Same id, new body","author":"BJ"}'
# {"id":3,"title":"Edited",...}   ← same id, updated fields

curl -i -X DELETE http://localhost:8080/api/posts/3
# HTTP/1.1 204

curl -i http://localhost:8080/api/posts/3
# HTTP/1.1 404
A complete CRUD (create, read, update, delete) API: controller → service → repository → database, in four files. Create and update both flow through the same repository.save() — the database keyed by id decides insert vs update.
Step 6: Validation and a global error handler
Send an invalid post:
curl -i -X POST http://localhost:8080/api/posts \
  -H "Content-Type: application/json" \
  -d '{"title":"","author":""}'
# HTTP/1.1 400
@Valid + @NotBlank already rejected it. But our 404s are still bare. Let's wire up the custom-exception pattern from Part 1. Create src/main/java/com/example/blog/exception/PostNotFoundException.java:
package com.example.blog.exception;

public class PostNotFoundException extends RuntimeException {
  public PostNotFoundException(Long id) {
    super("Post not found: " + id);
  }
}
And src/main/java/com/example/blog/exception/GlobalExceptionHandler.java — the Spring equivalent of Express error-handling middleware:
package com.example.blog.exception;

import org.springframework.dao.EmptyResultDataAccessException;
import org.springframework.http.HttpStatus;
import org.springframework.http.ProblemDetail;
import org.springframework.web.bind.annotation.ExceptionHandler;
import org.springframework.web.bind.annotation.RestControllerAdvice;

// "advice" applies to ALL controllers — a global error boundary
@RestControllerAdvice
public class GlobalExceptionHandler {

  // catches this exception no matter which controller threw it
  @ExceptionHandler(PostNotFoundException.class)
  public ProblemDetail handleNotFound(PostNotFoundException e) {
    // ProblemDetail = Spring's built-in RFC 9457 error body:
    // {type, title, status, detail}
    return ProblemDetail
      .forStatusAndDetail(HttpStatus.NOT_FOUND, e.getMessage());
  }

  // deleteById throws this when the id doesn't exist (Spring Data behavior),
  // so delete on a missing post must 404 too — not crash with a 500
  @ExceptionHandler(EmptyResultDataAccessException.class)
  public ProblemDetail handleMissingDelete(EmptyResultDataAccessException e) {
    return ProblemDetail
      .forStatusAndDetail(HttpStatus.NOT_FOUND, "Post not found");
  }
}
Update getPostById in the controller to throw instead of building the 404 by hand:
@GetMapping("/{id}")
public Post getPostById(@PathVariable Long id) {
  return postService.findById(id)
    .orElseThrow(() -> new PostNotFoundException(id));
}
This is the second valid way to handle a missing resource, and real codebases mix both — worth knowing the difference. Returning ResponseEntity (the Step 5 form) gives you fine-grained control over the status and headers in the controller. Throwing (this form) hands every status decision to the global handler, keeping controllers lean. Neither is wrong; pick one style per endpoint and stay consistent — e.g. POST/PUT return ResponseEntity because they carry a body with a custom status (201), while GET {id} throws so the single handler owns all not-found responses. updatePost, which also returns ResponseEntity with a 404-on-empty, is a fine place for either — you could throw there too and it'd behave identically.
curl http://localhost:8080/api/posts/999
# {"type":"about:blank","title":"Not Found","status":404,"detail":"Post not found: 999",...}
A missing id 404s consistently across GET and DELETE — the second handler above catches what deleteById throws when the row doesn't exist. Try it:
curl -i -X DELETE http://localhost:8080/api/posts/999
# HTTP/1.1 404  ← not a 500 crash
Any controller can now throw PostNotFoundException and the handler turns it into a proper 404 with an RFC 9457 problem-details body. Controllers stay clean; error formatting lives in one place.
Step 7: Configuration and profiles
Configuration lives in application.properties (or application.yml — Spring reads both from src/main/resources, and when both exist they merge). Add to src/main/resources/application.properties:
spring.jpa.show-sql=true
Save the file — DevTools restarts the app for you (no manual Ctrl+C needed) — then hit an endpoint and the log now shows every SQL statement Hibernate runs. Useful while learning; noisy in production. Which raises the question: how do you vary config by environment?
Profiles. A file named application-dev.yml overrides the base config when the dev profile is active. Create these two files alongside the .properties one — the show-sql line stays in properties, and the yml files add on top of it. A realistic production setup looks like:
# application.yml — base config
server:
  port: 8080

spring:
  datasource:
    url: jdbc:postgresql://localhost:5432/blog
    username: blog
    password: blog
  jpa:
    hibernate:
      ddl-auto: validate
    show-sql: false
# application-dev.yml — active only with the dev profile
spring:
  datasource:
    url: jdbc:h2:mem:blogdb
  jpa:
    hibernate:
      ddl-auto: create-drop
    show-sql: true
Activate a profile with ./mvnw spring-boot:run -Dspring-boot.run.profiles=dev (or SPRING_PROFILES_ACTIVE=dev). Without a profile active, only the base application.yml applies.
Inject a property into code with @Value. The :false is the default when the key isn't defined anywhere:
@Value("${feature.new-dashboard:false}")
private boolean newDashboard;
Define the key so it's controlled by a profile, not just a silent default (add to the appropriate application*.yml):
feature:
  new-dashboard: true
Or use @ConfigurationProperties for type-safe configuration. This is roughly .env files plus NODE_ENV branching, but structured and type-checked.
Step 8: Tests
Spring Boot includes JUnit 5, Mockito, and AssertJ. Replace the generated test or create src/test/java/com/example/blog/PostControllerTest.java:
package com.example.blog;

// "import static" pulls in methods (not classes) so you can write get(...) and
// status() bare instead of MockMvcRequestBuilders.get(...) — it's what makes
// the test read almost like an English sentence.
import static org.hamcrest.Matchers.*;
import static org.springframework.test.web.servlet.request.MockMvcRequestBuilders.*;
import static org.springframework.test.web.servlet.result.MockMvcResultMatchers.*;

import org.junit.jupiter.api.Test;
import org.springframework.beans.factory.annotation.Autowired;
import org.springframework.boot.test.autoconfigure.web.servlet.AutoConfigureMockMvc;
import org.springframework.boot.test.context.SpringBootTest;
import org.springframework.http.MediaType;
import org.springframework.test.web.servlet.MockMvc;

@SpringBootTest          // boot the whole application context
@AutoConfigureMockMvc    // ...plus a fake HTTP client wired into it
class PostControllerTest {

  // @Autowired field injection: "Spring, fill this in". Constructors
  // are preferred in app code, but @Autowired fields are normal in tests.
  @Autowired
  private MockMvc mockMvc;

  @Test
  void shouldReturnSeededPosts() throws Exception {
    // the DataSeeder from Step 4 runs for tests too
    mockMvc.perform(get("/api/posts"))
      .andExpect(status().isOk())
      // jsonPath queries the response JSON: $ is the root,
      // $.title a field, $[0].title the first element's field
      .andExpect(jsonPath("$", hasSize(greaterThanOrEqualTo(2))));
  }

  @Test
  void shouldCreatePost() throws Exception {
    String json = """
      {
        "title": "Hello from a test",
        "content": "Text blocks make JSON fixtures pleasant",
        "author": "BJ"
      }
      """;

    mockMvc.perform(post("/api/posts")
        .contentType(MediaType.APPLICATION_JSON)
        .content(json))
      .andExpect(status().isCreated())
      .andExpect(jsonPath("$.title").value("Hello from a test"));
  }

  @Test
  void shouldRejectBlankTitle() throws Exception {
    mockMvc.perform(post("/api/posts")
        .contentType(MediaType.APPLICATION_JSON)
        .content("{\"title\":\"\",\"author\":\"BJ\"}"))
      .andExpect(status().isBadRequest());
  }
}
Run them:
./mvnw test
# ...
# Tests run: 3, Failures: 0
@SpringBootTest boots the real application context; MockMvc fires requests at it without a network. Note the text block holding the JSON fixture — Part 1 paying off again.
For fast unit tests without the Spring context, mock the repository with Mockito:
package com.example.blog;

import static org.assertj.core.api.Assertions.assertThat;
import static org.mockito.Mockito.when;

import com.example.blog.model.Post;
import com.example.blog.repository.PostRepository;
import com.example.blog.service.PostService;
import java.util.List;
import org.junit.jupiter.api.Test;
import org.junit.jupiter.api.extension.ExtendWith;
import org.mockito.InjectMocks;
import org.mockito.Mock;
import org.mockito.junit.jupiter.MockitoExtension;

// Mockito only, no Spring context = milliseconds fast
@ExtendWith(MockitoExtension.class)
class PostServiceTest {

  @Mock   // a fake PostRepository — jest.mock() territory
  private PostRepository postRepository;

  @InjectMocks   // a real PostService, built with the mock above
  private PostService postService;

  @Test
  void shouldFindAllPosts() {
    when(postRepository.findAllByOrderByCreatedAtDesc())
      .thenReturn(List.of(new Post()));

    List<Post> result = postService.findAll();

    assertThat(result).hasSize(1);
  }
}
The shape is close to Jest: when(...).thenReturn(...) is mockFn.mockReturnValue(...), @InjectMocks is manual constructor wiring you'd do yourself in JS.
Step 9: Package and ship it
A Spring Boot application packages as a single executable JAR (Java archive — essentially a zip of your compiled code and its dependencies) with Tomcat inside. Stop the dev server, then:
./mvnw clean package
java -jar target/blog-0.0.1-SNAPSHOT.jar
Same app, one file, runs anywhere a JVM exists. That JAR is your deployable artifact — no node_modules to ship, no runtime to assemble on the server.
Maven does not generate a lock file the way npm does, but Spring Boot's spring-boot-starter-parent BOM (bill of materials — a curated list that pins the versions of hundreds of libraries known to work together) serves a similar purpose: consistent, compatible dependency versions across builds.
For containers, either let the build plugin make an image:
./mvnw spring-boot:build-image
Or write a small Dockerfile:
FROM eclipse-temurin:21-jre-alpine
WORKDIR /app
COPY target/blog-0.0.1-SNAPSHOT.jar app.jar
ENTRYPOINT ["java", "-jar", "app.jar"]
For GraalVM native images — faster startup, less memory, ideal for serverless — Spring Boot's AOT (ahead-of-time) processing is built in: instead of compiling to bytecode the JVM optimizes while running, the whole app compiles to a native binary up front. Add the GraalVM Native Build Tools plugin (org.graalvm.buildtools.native) and build with ./mvnw -Pnative native:compile.
A Look Ahead: Spring Security
We deliberately did not add security to the code-along — the moment the spring-security starter lands on the classpath, every endpoint requires authentication and all your curl commands start returning 401s. But you should know what it looks like, because you'll meet it in any real codebase:
@Configuration
@EnableWebSecurity
public class SecurityConfig {

  @Bean
  public SecurityFilterChain filterChain(HttpSecurity http) throws Exception {
    http
      .csrf(csrf -> csrf.disable())            // see the caveat below
      .authorizeHttpRequests(auth -> auth      // rules: most specific first
        .requestMatchers("/api/public/**").permitAll()   // ** = any depth
        .requestMatchers("/api/admin/**").hasRole("ADMIN")
        .anyRequest().authenticated()          // everything else: log in
      )
      .httpBasic(Customizer.withDefaults());   // log in via HTTP Basic

    return http.build();
  }
}
Spring Security configures a filter chain that runs before your controllers — middleware, in Express terms. For a stateless, token-based API you would replace httpBasic with a JWT (JSON Web Token) filter.
One caveat on csrf.disable(): CSRF is cross-site request forgery — an attack where a malicious site makes requests that ride on your user's logged-in session cookie. Disabling the protection is appropriate for a stateless API authenticated with tokens, where there is no session cookie for a cross-site request to ride on. If your application uses session-based authentication — as the httpBasic example above can — leave CSRF protection on. Do not copy that line into a session-backed app.
Capstone: Build a URL Shortener
You now know enough to build a service from scratch. Before reading the solution, try it yourself in a fresh Initializr project (same dependencies as the blog). Requirements:
POST /api/linkswith{"targetUrl": "https://..."}creates a short link with a random 7-character code and returns it.GET /{shortCode}responds with an HTTP 302 redirect to the target URL and counts the click.GET /api/links/{shortCode}/statsreturns the link with its click count.- Short codes must be unique, and click counting must survive concurrent requests.
Requirement 4 is the trap — and it's a trap that doesn't exist in single-threaded Node. Attempt it, then compare below.
Entity
@Entity
@Table(name = "short_links")
public class ShortLink {

  @Id
  @GeneratedValue(strategy = GenerationType.IDENTITY)
  private Long id;

  @Column(nullable = false, unique = true, length = 7)
  private String shortCode;

  @Column(nullable = false, length = 2048)
  private String targetUrl;

  private long clickCount = 0;

  @CreationTimestamp
  private LocalDateTime createdAt;

  // getters and setters for all fields — generate them with your IDE
  // (IntelliJ: Code → Generate → Getter and Setter)
}
The unique = true on the column generates a unique constraint (and, on most databases, a backing index) — that constraint is about to do real work.
Repository
public interface ShortLinkRepository extends JpaRepository<ShortLink, Long> {
  Optional<ShortLink> findByShortCode(String shortCode);

  // One atomic UPDATE in the database — no read-modify-write
  // window for concurrent requests to race in.
  @Modifying   // this query changes data (default assumption is SELECT)
  @Query("""
    update ShortLink s
    set s.clickCount = s.clickCount + 1
    where s.shortCode = :shortCode
    """)
  int incrementClickCount(String shortCode);
}
That @Query string is JPQL, not SQL — it names the entity ShortLink and its fields, not the table and columns. Spring translates it to real SQL for whatever database is on the classpath. :shortCode is a named parameter, filled from the method's shortCode argument (you can also use ?1 for positional).
Request DTO
A data transfer object defining the shape of the POST body — and here's Part 1's "use records for DTOs" advice paying off. Validation annotations sit right on the components:
import jakarta.validation.constraints.NotBlank;
import jakarta.validation.constraints.Size;

public record ShortenRequest(
  @NotBlank @Size(max = 2048) String targetUrl
) {}
One line of data shape instead of a class with getters and setters. (Entities must stay classes; DTOs are exactly where records shine.)
Service
// SecureRandom: strong randomness — Math.random() is guessable
import java.security.SecureRandom;

// thrown when a database constraint (like UNIQUE) is violated
import org.springframework.dao.DataIntegrityViolationException;
import org.springframework.transaction.annotation.Transactional;

@Service
public class ShortLinkService {

  // static final = one shared constant, like a module-level const
  private static final String ALPHANUM =
    "ABCDEFGHIJKLMNOPQRSTUVWXYZabcdefghijklmnopqrstuvwxyz0123456789";
  private static final int CODE_LENGTH = 7;
  private static final int MAX_ATTEMPTS = 5;

  private final ShortLinkRepository shortLinkRepository;
  private final SecureRandom random = new SecureRandom();

  public ShortLinkService(ShortLinkRepository shortLinkRepository) {
    this.shortLinkRepository = shortLinkRepository;
  }

  public ShortLink shortenUrl(String targetUrl) {
    for (int attempt = 0; attempt < MAX_ATTEMPTS; attempt++) {
      ShortLink link = new ShortLink();
      link.setShortCode(generateShortCode());
      link.setTargetUrl(targetUrl);
      try {
        return shortLinkRepository.save(link);
      } catch (DataIntegrityViolationException e) {
        // another request claimed the same code between generation and save;
        // the unique constraint is the source of truth, so retry with a new code
      }
    }
    throw new IllegalStateException("Could not generate a unique short code");
  }

  public Optional<ShortLink> findByShortCode(String shortCode) {
    return shortLinkRepository.findByShortCode(shortCode);
  }

  @Transactional   // wrap both statements in one database transaction:
                   // they succeed together or roll back together
  public Optional<ShortLink> recordClickAndReturn(String shortCode) {
    shortLinkRepository.incrementClickCount(shortCode);
    return shortLinkRepository.findByShortCode(shortCode);
  }

  private String generateShortCode() {
    // Strings are immutable, so += in a loop copies the whole string
    // every pass. StringBuilder is the mutable buffer for building one.
    StringBuilder code = new StringBuilder(CODE_LENGTH);
    for (int i = 0; i < CODE_LENGTH; i++) {
      int index = random.nextInt(ALPHANUM.length());
      code.append(ALPHANUM.charAt(index));
    }
    return code.toString();
  }
}
Two concurrency details are worth calling out, because they are exactly the kind of bug that a single-threaded JavaScript mental model hides. First, the click counter is incremented with an atomic update query instead of read-modify-write; loading the entity, bumping the count in Java, and saving it back would lose clicks when two requests interleave. Second, checking existence before saving cannot guarantee uniqueness — two threads can both pass the check with the same code — so the service leans on the database's unique constraint and retries on DataIntegrityViolationException. In a multi-threaded runtime, the database is the arbiter of uniqueness, not application code.
Controller
import java.net.URI;

@RestController
public class ShortLinkController {

  private final ShortLinkService shortLinkService;

  public ShortLinkController(ShortLinkService shortLinkService) {
    this.shortLinkService = shortLinkService;
  }

  @PostMapping("/api/links")
  public ResponseEntity<ShortLink> createShortLink(
    @RequestBody @Valid ShortenRequest request
  ) {
    ShortLink saved = shortLinkService.shortenUrl(request.targetUrl());
    return ResponseEntity.status(HttpStatus.CREATED).body(saved);
  }

  // root level, not under /api — this IS the short URL
  @GetMapping("/{shortCode}")
  public ResponseEntity<Void> redirect(@PathVariable String shortCode) {
    return shortLinkService.recordClickAndReturn(shortCode)
      .map(link -> ResponseEntity.status(HttpStatus.FOUND)   // 302
        .location(URI.create(link.getTargetUrl()))   // Location: header
        .build())
      .orElse(ResponseEntity.notFound().build());
  }

  @GetMapping("/api/links/{shortCode}/stats")
  public ResponseEntity<ShortLink> stats(@PathVariable String shortCode) {
    return shortLinkService.findByShortCode(shortCode)
      .map(ResponseEntity::ok)
      .orElse(ResponseEntity.notFound().build());
  }
}
Try it end to end
curl -X POST http://localhost:8080/api/links \
  -H "Content-Type: application/json" \
  -d '{"targetUrl":"https://billieheidelberg.com"}'
# {"id":1,"shortCode":"aB3xK9p","targetUrl":"https://billieheidelberg.com","clickCount":0,...}

curl -iL http://localhost:8080/aB3xK9p
# HTTP/1.1 302 → follows to the target

curl http://localhost:8080/api/links/aB3xK9p/stats
# {"shortCode":"aB3xK9p","clickCount":1,...}
Hammer the redirect in a loop and check that no click goes missing — that's your concurrency fix visibly working:
for i in $(seq 1 50); do curl -s -o /dev/null http://localhost:8080/aB3xK9p & done; wait
curl http://localhost:8080/api/links/aB3xK9p/stats
# clickCount is exactly 51
When to Choose Which
Choose JavaScript when:
- You need rapid prototyping or a small team.
- The workload is I/O-bound and event-driven.
- You are building a frontend, a serverless function, or a full-stack Next.js app.
Choose Java when:
- You need strong typing and compile-time correctness.
- The application is expected to live for years and grow in size.
- You want mature libraries for security, data access, and messaging.
- You are building enterprise backends, batch processing, or high-throughput services.
Resources
- Official Java documentation
- OpenJDK 21 features and OpenJDK 25 features
- Spring Boot documentation
- Spring Initializr
- Baeldung Java and Spring tutorials
- IntelliJ IDEA and the Extension Pack for Java for VS Code
Conclusion
Look at what's on your disk now: a playground where you ran modern Java feature by feature, a blog API with a database, validation, error handling, and passing tests, and — if you took the capstone — a URL shortener that survives concurrent traffic. That's not "read about Java"; that's built with Java.
Moving from JavaScript to Java means trading some flexibility for predictability and scale. Java's type system, the JVM, and the Spring ecosystem give you powerful tools for building long-lived, maintainable backends — and modern features like records, pattern matching, and virtual threads make the language feel far closer to home than its reputation suggests.
Where to go next: add an update endpoint (@PutMapping) to the blog API, swap H2 for PostgreSQL using the profiles from Step 7, or give the shortener custom vanity codes. The mental model takes time to shift, but you've already made the hardest move — from reading to running.